Wednesday, 3 August 2011

Influences on my work 1: Tudor Costume

The Tutor Report Form from Assignment 2 suggested that I spend some time looking at the work of artists and designers that I admire and include some analysis in my blog, considering how the work could influence my own practice.  So this is the first of several entries with some thoughts on the subject.


While Tudor costume isn't strictly the work of a particular artist or designer, from a very early age I have been fascinated by it and feel that it has influenced my ideas in the past and has great potential to so in the future.  I remember looking at pictures while at school - and it's a long time ago now so they must have been memorable! - and thinking how I loved the richness and variety of Tudor costume for both men and women.  I also like Tudor architecture, so the whole era has potential for me.


I tracked down some books on the subject to provide specific food for thought, and have scanned some example photos to add here.  The books I found were:


"The sixteenth century - a visual history of costume" Jane Ashelford, 1983 [ISBN 0 7134 4099 6; class 646.094205A]


"Costume of the western world: elizabethan and jacobean 1558-1625" Graham Reynolds, 1951 [no ISBN; 646.09R]


"English Costume in the age of Elizabeth, The Sixteenth Century" Drawn & described by Iris Brooke, first printed 1933, last reprint 1973 [no ISBN; 391.0942] (I found an ex-library copy of this in a charity book shop which cost me the princely sum of £1.75!)


The first thing that really stands out is how busy this woman's costume is, there is lots going on!  In addition to the basic dress there are jewels, trims, braids, ruffles, gloves etc.  Yet somehow it all goes together.


Sunday, 5 June 2011

Assignment 2: Some Thoughts & Conclusions

I found it quite difficult working around the rest of life to do this assignment, and frequently wished I had a separate exclusive area I could do my dyeing work in as you do need a reasonable amount of space.  Buckets of water with fabric soaking, somewhere to put an additioinal small microwave (a work colleague very kindly donated an unwanted one to my cause!), mixing dye without it going where it shouldn't, and finding space to leave things to dry all caused practical challenges.  This was also part of the reason why I didn't attempt to do any screen printing at this stage as I would have needed to pack up all of the dyeing stuff I've got away - probably in the shed/roof - to make sufficient space to have a go at the printing.  It was just one thing too many on top of everything else for me to cope with.  However, I have in the interim managed to acquire some basic screen printing kit (an A4 screen, and a squeegee, so a good start) which is quite exciting and once I have finished my City & Guilds Level 3 course at the end of June I plan to have a go at that and add some samples and notes to the work I've done for this assignment.

My teenage sons were as helpful as they could be in working around me and what I was doing, and since they are interested in the arts and creative processes they had a reasonable understanding of what I was trying to achieve.  However, there were inevitably a number of comments about such things as the smell of 'cooking' when onion skins, pine cones and so forth were brewing, and mysterious buckets, plastic containers and so on and their contents were sat brewing!

I feel I must add a note here about the impact of the health issues of my younger son.  In addition to this being his final GSCE year he has recently been diagnosed with two fairly serious medical conditions consisting of both a heart defect and digestive issues. As his single reponsible parent the investigation and diagnosis of these has taken quite a toll on me both mentally and physically during the past 18 months.  There are times when the stress of work plus the ongoing stream of visits to the hospital for further tests, assessments and consultations in addition to all of my other responsibilities have left me finding it very difficult to drum up the extra bit of physical and emotional energy to complete the OCA work.  It is inevitable that such a situation would impinge on what I am doing, but at the same time when I do 'get stuck in' it is good that I have something of my own to channel my thoughts away from the everyday worries of life and give me personal satisfaction.  This is a thought I hold on to.

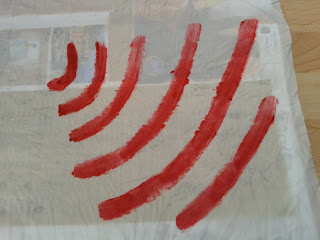
Anyway, I am pleased with the work that I have done in the end for the assignment, even if I wish I could have done a lot more.  I have tried to both follow the instructions and ideas of others as well as develop those of my own.  To this end I even tried an experiment in using a chocolate fondue 'kit' (one we'd received as a gift and in the usual fashion used only once) as a method of melting the remains of a Christmas candle as a possible substitute for the usual batik kit.  The original heat source was a tea light, and although it did melt the wax, it didn't do the job very efficiently and the wax cooled too quickly so when I peeled the stencil off all of the wax came off too!  I therefore changed to using the 'bowl' in an old (another donation from a work colleague) saucepan to create a kind of bain marie which worked very well.


The tea light worked, but slowly and didn't keep the wax hot enough.


So I moved to using an old saucepan instead, and that worked a treat.

I tried painting two pieces of cotton fabric with the wax, one using a stencil I already had ...


And one just painting a simple pattern freehand


Unfortunately in the end neither of the experiments worked very well as the wax was too thick to get into the fibres of the fabric and work as a resist to prevent the dye spreading.  However, you can see some of the wax pattern in the finished results so all was not totally lost.  The point is that I've since thought about the problem and plan to try using the remains of some other wax candles I have as they're white, and look like they would produce a much thinner wax than the red, which I chose because it would stand out in the photographs I took!  So while I intend to buy some of the 'proper' batik wax when the opportunity arises, I'm interested in trying out the white remains I have just to see what happens ......  As the song goes, "From the ashes of disaster grow the roses of success!", so it's worth having another try.

I've mentioned the above for a specific reason.  The thing about these assignments is that they are the start of a journey that will never really have an end because there is always something new to try.  The samples I've produced really are just the tip of the iceberg, and I've ideas for other things to experiment with next - different quantities, different timings, other ingredients and materials and so on.  Like all craft work it's neverending.  At first glance dyeing does seem complicated, and in many ways it is, with all the different possible combinations of farics and threads and dyes and mordants and quantities, especially if you are looking for precise results.  But if you are just happy to have a go on a 'see what happens' basis then there is lots of fun to be had, sometimes with most unexpected results.  And at the end of the day I think that is the whole point of the assignment, to help you learn about the processes, to develop your own ideas, and to encourage you to experiment further outside the 'confines' of both the assignment itself and the course as a whole  So I've learned a lot, but can see that there is plenty more to discover.

Finally, I did try one experiment of my own which isn't strictly dyeing but rather making marks on fabric by encouraging staples and paperclips to rust while sat on them.


Here's a picture of the fabric on the tray, complete with rusting 'bits'.  I've come across several references to making marks on fabric by encouraging the growth of moulds  and other things on them, and am now very intrigued with the idea and have added it near the top of  my list of things to try.  I've no idea where this will take me, but as always it's as much - if not more - about the journey as it is about the destination.

Saturday, 5 March 2011

Dyeing Research

Although I've done some dyeing before either generally (and sometimes accidentally!) as well as part of my City & Guilds courses, this second assignment provides the opportunity to do some more background reading/research into the subject as well as some physical experimentation.

There are several suggestions as to which way to go - ie natural dyes, chemical dyes, screen printing - in the assignment notes so the first thing I had to do was make some choices as I was required to at least have a go at two specific areas.  Unfortunately funds are extra tight at the moment, so although I'm building up a file of information about possible online sources of dyeing materials, I don't really have sufficient money available to send for all of the things I'd really like to, especially for the natural dyeing, so I'm going to try and be imaginative and 'recycle' some things where I can.

After reading through the assignment notes I naturally turned to both the internet and the local library for further iniformation.  Articles, web sites and items I found of particular interest on the internet I decided I would print off to go in a dyeing research and reference folder. Meanwhile below are scans of the covers some of the books I managed to find in the local library as background reading:


This is a really useful reference book with far more suggestions in it than I could possibly try for this assignment!  A very good place to start.and more for later


You can't beat a bit of good old tie dying!  I think I'll incorporate this in some form in my finished samples.


And also batik, which I've always wanted to try properly but have never had the 'kit'.  I do have the remains of a few candles from Christmas though so it might be worth trying an experiment or two?


And also shibori to add another extension of ideas.


And while painting isn't quite dyeing, there's no reason why you can't put one with the other!  Part of the beauty of dying is not always knowing what end result you are going to get, and the creation of 'accidental' backgrounds to inspire further work.

Having reached this point I decided I would do some experimentation with chemical dyes (Procion MX and acid) as I already had some of these in my supplies.  While there were some lovely ideas for natural dyes, again funds precluded buying materials so I decided to look around and do some starter experiments with what was readily available around me, eg grass, onion skins etc.  After all this assignment is intended - as indeed is the whole course - to build a foundation of knowledge; there would be plenty of time in the years ahead to try out more things.

Tuesday, 8 February 2011

OCA Assignment 1 - my thoughts on 'What have you achieved?'

Here are my thoughts and responses to the questions posed under "What have you achieved?" at the end of Assignment 1

  • did you feel that your finished samples fulfilled the project theme that you chose to work with?  did you make the right choices and decisions when selecting at each stage of the project?  If not what would you change and how would you alter the outcome?
I feel happy to answer this question with a 'yes' because in the end I chose a theme that was personal for and to me.  My choices and decisions were therefore direct, ie did I like the result?  could I live with this?  However, this would have been more difficult if the project had been for a third party.  Plus the information provided in the assignment was very limited, giving little practical information that would be essential if you were carryuing out the project for a third party.

For example I have assumed that I was making samples for fabrics that I would be creating, but this could easily not have been so, in which case practical decisions would have needed to be made regarding cost, time, equipment, materials and so on.  So in those circumstances then my answer could easily be no, I didn't make the right choices and decisions.  However, I'm a practical person.  So, even though I assumed the finished items would be made by me for me, I incorported questions like 'could I live with this for a long period of time?', 'would I like to make a larger piece of this?', and 'does this balance between being practical and unusual?'  These questions and the answers to them were partly why I rejected using the cut away samples that I used, as in both cases they failed one or more of the questions.

Of course there were lots of techniques that I didn't try when doing my samples - printing on fabric for example - and there are those that could say that the omission of these techniques was a bad choice.
  • can you see a clear line of progression from source material through to the finished sample pieces?
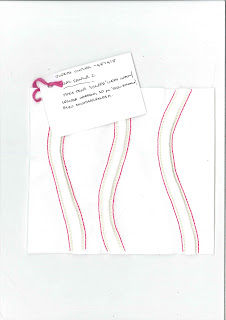
This is always an interesting question to answer, because obviously I'm close to the subject so might see something that others might find hard to observe.  However, the curved lines were in the original observation study, and they continue through to my final samples.  In the end I made a conscious decision to utilise a particular source of the curved lines (those in the Liscio logo) and not start to use other curves that were appearing.  I aided this by bending my 'flexible curve' into a shape resembling them and did my best to keep to using this same shape through the initial sketching to the drawing of the curves on my final samples.  In other words, I did my best to concentrate on one particular source area, and not go off at too many tangents, although I did look at some other potential ideas and incorporate a broader range of ideas for samples etc in my sketchbook.  This was deliberate because one thing I have learnt in the past is that when you are creative it is far too easy to get drawn down too many potential paths and cul-de-sacs and become lost in a world of all the things you'd like to try.  Obviously the more time that is available the less strict you have to be on this, and clearly you have to incorporate some variances in order to explore a theme, plus a lot of good ideas are often discovered as 'accidents'!  However,  I feel that what I am doing now is a bit like learning any new skill.  You have to limit yourself and practice well at each level, gradually increasing your knowledge and confidence, however tempting it is to let those areas that interest you run on ahead without you building a strong enough foundation.  This could of course just be my approach, but at this time I think it is the best one for me personally and will help me to achieve what I need to achieve in order to complete the course.
  • how useful was the initial 'brainstorming' exercise and assembling of the word list in stimulating your imagination and in helping you to define and focus on an atmosphere or mood?
I think an exercise such as this is always useful provided you do just 'brainstorm' and quickly jot down what comes to mind rather than worry over it.  I literally put down in words the thoughts that were in my head.
  • how important was the choice of fibre in terms of determining the qualities that you achieved?
I deliberately restricted myself to only a limited range of fibres for this project.  I stuck to the same main fabric and all of the samples are produced using a small range of additional fabrics or threads.  I think this arose from the fact that my theme led me to look for a simplistic result.  Less is more in this case, the interest being created by the curved shapes and the contrast between the white the the splashes of colour and texture.  That approach fitted this project.  Another project could be totally different.  For example, if I'd been inspired by the curves but not used the colour palette nor the modern essence of the building I could have used lots of lovely textured fabrics and threads in gold, bronze and brown (some of my favouite colours!) to create something totally different.
  • how important was the use of colour in this project to create the right atmosphere or mood?
To me colour is always important!  However, in this instance it wasn't so much the use of colour, but rather the selective use of colour in a limited way that was necessary to create the right atmosphere or mood.  Less was more, and only one of my final samples is fully coloured, chosen to compliment the other two samples which are basically plain with coloured highlights.  I saw this as a key element when choosing which samples I would put together to be my final three.
  • did you find it difficult to co-ordinate your samples so that they could be used together in some way?
No, I didn't.  I think that having followed the process through the resulting choices work well together.  That is not to say that I couldn't have created several variations even of the final three samples to give more options that could work together, of course!
  • how do you envisage your samples being used in your chosen environment?
Final sample 1


I envisaged this sample as being used for curtains any any other areas where drape was required.  That said, as can be seen from my test samples I did create a version in another colour way (ie lime main, pink stitching) that demonstrates that this could be used for an insert in a cushion cover for example.

Final sample 2

This sample has a 3d look, so would look really good where that could be seen.  Again it could make a good cushion cover - one that you probably wanted to touch!  It might look interesting as a lamp shade.  If it was decided to use final sample 1 as a net curtain, then this sample could make an interesting curtain to go with it.  I did think at one point that it could be used to make a fascinating wall hanging, with the 3d effect creating small shadows.


Final sample 3


This is the sample that I see being used to make chair covers, table cloths and that sort of thing, where sample 1 would probably stretch too much and the holes would prove a nuisance (fingers and buttons on clothing getting stuck in them) and the raised ridges in sample 2 would either be uncomfortable to sit on or become squashed with constant use.  Of course the curved stripes don't have to be all over - nor do those in sample 2, and for that matter strips of sample 1 could be used as inserts into curtains alongside just the plain fabric/strips of fabric based on samples 2 or 3.  The whole point of making co-ordinating fabrics is that they suggest options for mixing and matching!

Wednesday, 12 January 2011

City & Guilds Level 3 Machine Embroidery - Class 4, 07/01/11

Our original class date had been 3rd December, but the heavy snow falls and icy conditions at the time meant that this had to be cancelled.

Anyway, this day was our 'dyeing day' when we had a go at tray dying and microwave dying, although for my purposes I actually did some dying in plastic bags in an endeavour to create strong plain colours that could be useful for my finished wall hanging.

The dye used throughout was Procion MX which our tutor supplied and mixed for us and we all contributed towards the cost of as this seemed the best way for a group working together in a classroom environment.  The tray dying was mostly done in (clean!) cat litter trays.  We soaked the pieces of fabric first in a bucket of soda ash solution, and then added the dyes to the damp fabric and left them in the tray for a few hours to 'take'.  We mixed the dyes to try and create blends and patterns, screwed up or folded the fabric, added a few resists here and there (tied up with string, stitching, tying knots around plastic shapes etc) and generally experimented.  After the few hours the fabric pieces were rinsed in plain water and inspected to see how they turned out, and if what happened was what we expected!

The microwave dying involved a similar process, but we tended to spray the dye onto the fabric in a more controlled manner, sometimes adding rock salt or similar to give distorting effects, and used a range of fabric types (plain, already patterned, calico, silk, linen, lace - although nothing that had any metal fibre in it to the best of our knowledge as that's not a good idea in the microwave!).  The fabric pieces were put into a suitable microwaveable container, eg plactic ice cream box, covered with/wrapped in microwaveable cling film and 'cooked' for a couple of minutes.  After cooling the pieces were again rinsed in plain water and the results examined.

Here are my samples from the micorwave dying.  It was obvious that the natural fibres generally took the dye better than the man made fibres, although there were a couple of variances.
 As mentioned above, because I knew that for my wall hanging I would be using BU corporate colours I wanted to see if I could produce some pieces of fabric that were plain dyed with strong colours as near as I could achieve to these with what was available on the day.  In order to do this I did something different to my classmates.  I had brought along a few threads and pieces of plain fabric either in white or a neutral colour.  I then made up 5 bags with the same set of sample pieces in each and added dye to these in the hope of achieving black, lime, hot pink, sunshine yellow, and orange.  I sealed the bags and left the samples soaking in the dye mix for over 24 hours, not rinsing them until I was at home the next day.  Here is a picture of the results as stuck into my sketchbook.


On the whole I was really pleased with the results.  The most disappointing was the black which really looks like a dark blue/charcoal colour on all of the samples.  However, on the whole the rest of the samples have turned out very well for a first attempt.  ;o)

There are a couple of things that need to be remembered when looking at these.  Firstly the 'original' colour squares stuck at the top of each column are printed  on while paper using a colour laser printer at work.  However, I've noticed that when I print using the different printers we have, even though they are all industrial laser printers from the same manufacturer, the finished colours can vary.  However, I don't need precision for this so I'm happy that I was able to produce 4 out of the 5 very close to what I was looking for, and certainly close enough to be able to use snippets of them to add colour to my project.

The other thing to remember is that I didn't mix the dye solutions, nor did I keep any record of how much dye was added to each bag, and I had to mix the colours available on the day to create what I thought looked like it might turn out OK.  That being the case I couldn't guarantee to achieve exactly the same results again if I needed to dye more of the same fabric.  Clearly if I was seriously trying to achieve specific results I would need to be take a bit more of a scientific approach in the future.